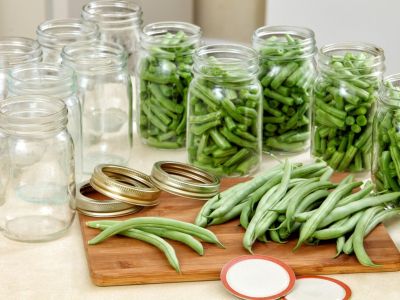
Preserving Garden Green Beans
One of the easiest methods for preserving fresh green beans is to freeze them. Frozen green beans retain their texture, color and flavor. They can be microwaved for a quick and easy side dish or used in a variety of recipes. Follow these steps to freeze fresh green beans:
Harvest tender, crisp pods that are free of damage. Whole or cut beans can be frozen, but whole beans store more compactly if they are straight.
Wash beans in cold water, then snip or break off the ends and remove strings. Cut beans into 1 inch (2.5 cm.) pieces, if desired.
To prevent loss of color and flavor, blanch green beans before freezing them. To blanch beans, add up to four cups (946 ml.) of prepared green beans per gallon (3.7 l.) of boiling water. A teaspoon (4.29 ml.) of citric acid per gallon of water can be added as an anti-microbial agent.
Once the water returns to a boil, blanch the green beans for 2 to 3 minutes. Add an additional minute of cooking time for elevations over 5000 feet (1524 m.). Once blanched, remove the beans from the pan and submerge them in ice water to halt the cooking process.
Remove the beans from the ice water bath and drain. Package meal-sized portions of blanched beans in freezer bags or containers. Or, freeze the beans in a single layer on a tray overnight to prevent the beans from sticking together. These can be stored in larger bags and removed as needed.
Label and date all preserved food. Plan to use frozen beans within 10 months.
Dehydrating Green Beans
Green beans can be dried using an oven or a home dehydrator. Dried green beans make a healthy snack or can be reconstituted by adding to soups, stews or casseroles. Follow these tips for drying green beans:
Prior to drying, harvest, prepare and blanch green beans as directed above. For better texture, freeze blanched beans for 30 to 40 minutes. Arrange the beans on a tray in a single layer with no beans touching. Place the trays in a dehydrator or oven set at 140 degrees F. (60 C.) for 8 to 14 hours or until the beans are very dry and brittle. To condition the beans for storage, place them in a large plastic or glass container. Fill the container no more than 2/3 full and shake it periodically to separate the beans. If no moisture forms inside the container, continue conditioning the beans for 4 to 10 days. If moisture forms, dehydrate and condition again. Store conditioned beans in sealed bags or containers. Use within 6 to 12 months.
How to Make Canned Green Beans
Unlike tomatoes and pickles, green beans are a low-acid food and must be canned using a pressure canner. The exception is when pickling green beans in a vinegar solution. The acidity of the vinegar halts the growth of Clostridium botulinum, the bacteria responsible for botulism. Eating food that has been canned improperly can lead to illness or even death, so make sure you are confident in what you’re doing before you proceed:
Harvest, thoroughly wash and prepare only high-quality produce for canning. It takes approximately 14 pounds of beans to fill a 7 quart (6.6 l.) canner or 9 pounds (4 k.) to make 9 pints (4.2 l).
Check jars for cracks or chips, then wash. Prepare lids according to manufacturer’s recommendations.
To cold pack, fill the jars tightly with prepared, raw beans. If desired, a teaspoon of salt per quart or 1/2 teaspoon (2.4 ml.) per pint can be added. Fill the jars with boiling water.
As an alternative, the beans can be hot-packed by first boiling the beans for 5 minutes in a pot. Fill the jars with beans and boiling water.
When canning, always leave the top inch of the jar devoid of food or liquid. This headspace is required for proper sealing of the jars.
Once filled, wipe the sealing surface of the jars with a damp paper towel and put on lids and bands. Process according to manufacturer’s instructions or consult your local extension office for updated recommendations.
After processing, remove the jars from the canner and cool for 12 to 24 hours. If sealed, the jars can be washed, labeled and stored for up to 2 years.
